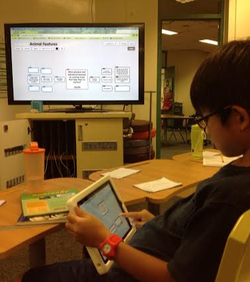
 Students love Popplet because of the ease of use, the bright colors and the options for adding text, photos, and more. We recently used Popplet in our 3rd grade classroom to ogranize our ideas around an essential question we were contemplating in class: How do behaviors and physical features help animals to survive? We chose this over making a list because it's more engaging and it is quick to make. The sharing options are great too. Students will soon add these Popplets to their Learning Journey sites to share their learning with their families.
0 Comments
PowToon is a free web-based site that allows you to create entertaining animated presentations. It's easy and provides a great library of free music, static graphics, and animated graphics to add to your presentation. I just made this one in about 4 hours of somewhat interrupted working time. These videos will be sure to engage your students. The video below I made for 3rd Graders to learn how to use the Latice Method to multiply multi-digit numbers by 1-digit or multi-digit numbers. Enjoy and then try it yourself!  Since kids are so engaged in technology during class, in almost a zen like state of mind, I thought an LMS from Haiku would maximize learning potential through student engagement and careful content design. So I am building this LMS for an upcoming math unit on multiplication and division. This course has interactive lessons supported by videos, Google form quizzes, and audio recordings to reach all levels of learners. As I build this, I keep in mind the learning objectives and student engagement. This is a perfect way to gather all those great tech tools and content into one student safe place.
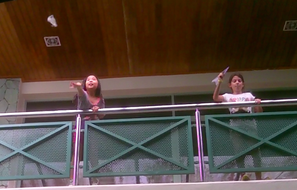
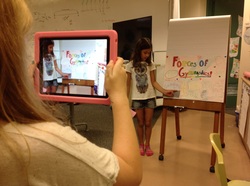 When students geared up to present their force experiments they had worked so hard on, we were up against a time crunch. In order to give each student the chance to be on "stage" we broke into groups of 3-4. While one member of the group was presenting their learning another member caught it all on camera. If the student was using their own iPad to show their presentation then another student videoed with their own iPad.
Now these students have a record of their presentation to reflect on and add to their digital portfolios. As their teacher, I also have a record of their presentation and I won't miss a thing. This freed me up to move around the room and listen and assist when needed. It also took the pressure off the students, both those who wanted to share with a larger audience, since they can put these on their digital portfolios, and for those who have a bit of stage fright. Yet, another way iPads are differentiating the learning experience. 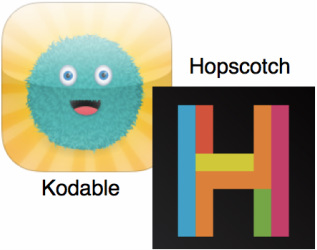 Hopscotch is a fun iPad app that can be used in math classes to challenge and engage students.
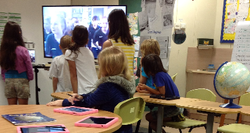
One great idea is to ask students to work in partners or groups and draw shapes using the app without giving them any hints as to how to do this. This allows the students to learn how the app works in a collaborative setting. They soon find themselves excitedly drawing a square using one of the characters, next they can draw a triangle, and then even a circle. Before students know it they'll be using collaborative skills, coding, and exploring polygons in a new way. This tech idea was first introduced to me by Gary Coyle at the iPad Summit, New Delhi in November '13. While playing with this idea, I happened upon Kodable and set to work co-coding with my 3 1/2 year old daughter (if you have an early learner in your classroom or home, I highly recommend co-coding). Kodable is a simplified coding app. Younger students can use this app to practice their if - then skills while planning and making connections. Coding has some fantastic benefits in the classroom, but it's an art using it in an effective and meaningful way beyond the benefits of just coding. I hope these ideas inspire you to try coding in the mainstream. 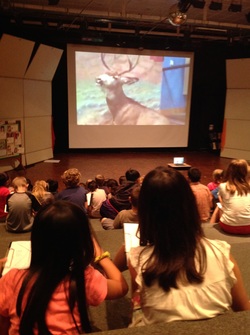 Skype Lessons open the walls of the classroom to many resources not possible before! We were able to kick off our Adaptations science unit by going on a virtual tour of the Buffalo Bill Center of the West museum located outside Yellow Stone National Park by taking part in the Skype lesson they created called Amazing Animal Adaptations . George Miller took us on a tour around the museum while using his iPad and just the right language for 3rd graders.
100 students and roughly 10 teachers were memorized at the massive bear paws and antlers on the moose, made even larger by our big screen in our theater. A Visible Thinking routine called See, Think, Wonder kept students' minds buzzing while George opened their eyes to adaptation and a place half a world away. 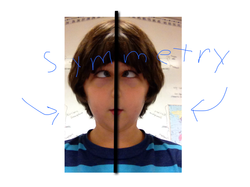 Make silly faces and show an understanding of symmetry using PhotoBooth and Explain Everything. PhotoBooth has a handy mirror effect that allows students to take their understanding of symmetry and apply it to fun photos of themselves. Putting these photos into Explain Everything then allows students show their understanding of lines of symmetry using voice and screen recording. These videos can then be used for sharing their knowledge of symmetry on their Digital Portfolios or to teach younger students about symmetry.
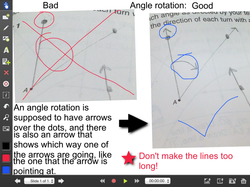 Angles that rotate is a new Geometry concept for my 3rd graders. We practiced drawing angles with different rotations and various angle degrees using straws and twist ties. I walked around with an iPad and used the camera feature to show students examples of what to do and what not to do. This showed up on the TV using Airplay. Then students did a "gallery walk" and silently observed their classmates angle rotations. Their mission during the "gallery walk" was to find an angle drawn correctly and an angle that needs some improvement and us their iPad and capture an images of these angles. They then imported these images into Explain Everything and described the angles. Next, volunteers used Airplay to share their findings with the class. Once students were put in a judging position by looking at their peer's work they were then able to better analyze their own angle rotations. To round up the activity students applied their improved understanding of angle rotations to their own work.
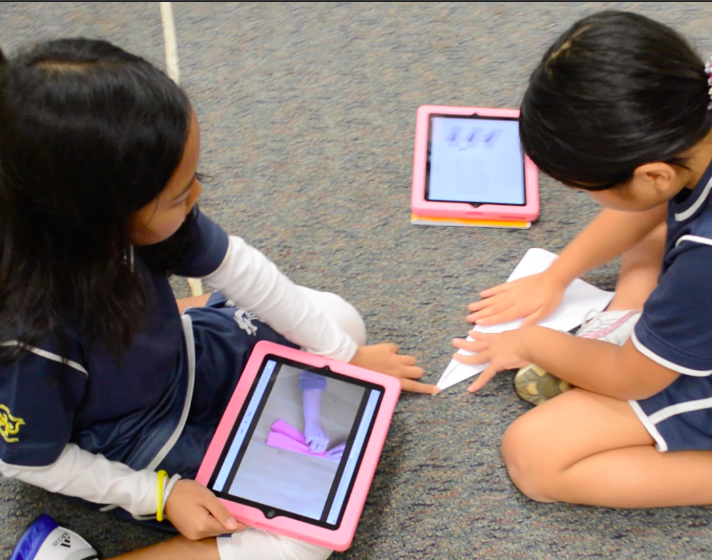
 In effort to open the walls of our classroom through technology we played an exciting game of Mystery Skype today. We called a class somewhere in the world using Skype (arranged by myself and the other teacher ahead of time through Twitter). The students then used resources such as atlas, globes, and Google Earth and Google Docs to try to figure out where the other class was located and keep track of our questions and answers. Sadly for us, the other class found us in only 3 questions! But they played on and let us try to find out where they were located. Each student had a job and while some jobs were more vocal than others everyone took part. We are a 3rd grade class and they are a 6th grade class. It was great to see how they communicated once they knew the age differences. My students even asked to be their pen-pals Afterwards we reflected on how it went and how we can make it go better next time. One reflection was that we need everyone to stick to their jobs better to make things more equal. Another was that we communicate with the other team that no one should ask about countries to encourage only talking about geography. All in all, students are asking when we will do another Mystery Skype. This was one lesson packed full of relating skills and resourcefulness and even quite a bit of resilience. Here is the Doc I shared with my class. This includes job descriptions and a spreadsheet for collecting questions and answers. Next time I will have my students apply for jobs they want to allow more student choice and add another layer of importance and engagement to their roles in the activity. Here are some other really useful links: https://education.skype.com/mysteryskype http://pernillesripp.com/2011/10/25/so-you-want-to-do-mystery-skype/ http://mysteryskypes1213.weebly.com/  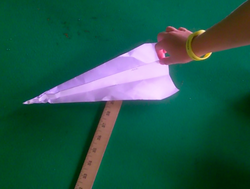 We used iPads in four different ways while learning about forces applied on paper airplanes. 1. Each student used their iPad to watch a BrainPop video on airplanes. They had the chance to rewind and re-watch and even use closed captioning to see the text. After students were finished we had a class discussion on what new words or concepts they absorbed. They were then presented with a question, how far can you make your paper airplane fly (flown by hand)? Together we began to take notes for the scientific method. Students wrote in their inquiry notebooks telling the question, their hypothesis, materials and the procedure. 2. Students then read my Airplane Forces iBook (created with iBooks Author) about the forces related to flight. They took their time and went at their own reading pace. At the end of the book students explored two embedded video resources containing tutorials on making paper airplanes. Next, they began making their planes while excitedly talked about the planes using key words they previously didn't have in their vocabulary. 3. After a discussion on the scientific method and process students put their notes into Explain Everything. Students gathered their materials which at least included their plane, a measuring device, and their iPads. We went to our student determined flight testing area and a team of students marked off bench mark meters. 4. Soon the planes soared and swirled, and dive bombed as students executed their tests. Their partners recorded the action with the iPad video cameras and they measured their best flights. Once the testing was complete students headed back to the classroom and recorded their observations. To finalize their Explain Everything documentation they embedded photos and video from the process and added a voice recording. These will now be added to their ePortfolios, ready to reflect on their learning process and share with their families.
|

Kate White
|
 RSS Feed
